Wednesday, December 4, 2013

Some Proper Signage


I made this sign and sign post for the shop about a month ago but never got around to posting pictures. Does this mean that  I'm going into business? Absolutely not. I don't even have the energy to do what's on my wife's list much less try to do things for actual customers. This is just another piece in my quest to immerse myself in my own little 18th century fantasy world. The fact that I listed turner on there is a bit of a stretch for now, but I'm getting there.

The sign itself is made of red cedar, painted with a base of exterior latex. The lettering and tool silhouettes are also just exterior latex paint. I'll see how it holds up to the weather over time.

The post is a piece of 3x5 white oak that I got from the same Amish mill that I got the pine tongue and groove that I used for the shop floor and interior walls. The arm is attached to the post with a draw-bored mortice and tenon joint, so the iron bracket is rendered pretty much just ornamental. The curls on the end of the arm bracket and the brackets that hang the sign were just heated up in my paint can forge and bent around a couple pieces of small pipe that I held in a vice. I'm pleased with the overall effect.


Sign's up, flag's out. Shop's open.


The flip side.

Practicing on the spring pole. This will be a taper reamer.

Tuesday, November 5, 2013

Hiding the 21st Century...


...right below the 21st century.

One thing I love about a hand tool shop is that you can listen to music or talk radio while you work and never really miss a word or a note. I've had my iPod dock and XM radio in my shop from day one and use them every time I'm out there. What I didn't like was how they were just sitting on the floor out in the open. This hanging cabinet was the solution. I had originally planned on just doing a painted poplar cabinet, but I've had this walnut hanging around forever so I figured the no cost feature was nice. And I couldn't bring myself to paint the walnut!

The construction is nothing fancy, just rebate joints top and bottom of the sides and a dado in the middle for the shelf. French cleat to hang it on the wall. Didn't even bother with a back. The one thing I did that was new for me was to re-saw a piece of crotch walnut to bookmatch the panels for the doors. Just did the re-saw with my 22" rip saw; didn't take long at all and did a pretty fine job. Smoothed things up a little with the plane and put a crude bevel all the way around to fit into the mortice and tenoned, grooved frame doors. Finished them up with a card scraper to deal with the crazy grain of the crotch wood. When I went to glue the doors up, I decided that I liked the look more with the beveled panels out rather than in as I'd originally planned. Had I known that I'd have maybe took a little more care with the beveling. Oh well, I'm happy with the look and it is just shop furniture after all. I really like using that excuse; gives me a license to not feel I have to be absolutely perfect.

I didn't want to really spend much on nice hinges, but I didn't want shiny brass either, so I bought shiny brass hinges from Lowes for a couple bucks a pair and gave them a 24 hour vinegar bath. That gave me the look I wanted. The finish is just a couple coats of Minwax Antique Oil Finish. After hanging it and putting in my equipment, I finished things off by plowing a groove in a piece of pine, painting it white, and using that to cover the plug wires heading down to the outlet beneath the cabinet.

I may get around to putting handles on it one day, maybe not. Same goes for a catch. The doors stay closed on their own so no rush there either. Now to replace that ugly grey metal breaker panel door with a nice wooden one...


Here's an old pic I found that shows where the radio used to reside.

The one in progress pic I took; chopping out the rebate, later smoothed out with the rebate plane.

21st century sound box hidden. Right under the split unit heating and cooling system. :-)

What's behind closed doors.

And the cable trough.

Monday, September 30, 2013

Finally, Something Useful Off the Spring Pole Lathe


I've been slowly trying to gather a collection of tools for windsor chair making over the last year or so. This  past Father's Day my wife got me the large Lie-Nielsen/Drew Langsner froe. I'm sure it's going to be a great tool, but without something solid and wooden to whack it with it's kind of useless. Time to make a froe club.

A while back, we lost part of a maple tree on the property to a storm. While cleaning up the mess I saved a section with the intent of turning a club and that's what I did last week. I peeled the bark off, (which I should have done earlier; a couple wood worms had gotten to it), found the approximate center, and chucked it up in the spring pole lathe. Took about an hour and a half, but eventually I ended up with what I think will be a nice froe club; heavy, dense, and hard.

It was fun to actually turn something other than a practice piece but I proved to myself again that I really need practice on the spring pole. I guess my technique is just poor because the only thing that I really have any success with is the roughing gouge. Can't get any kind of acceptable results with the skew or the 2" straight chisel. Anyone know a good place to learn turning techniques for a spring pole lathe? I think it's a whole different ball game than a regular powered or even a treadle lathe. Don't get me wrong, the spring pole is a blast to turn on, just wish I could get better results.


Ready for a log.

The tools. Ashley Iles carbon steel turning tools from TFWW.

Friday, August 16, 2013

Another Aspiring Young Woodworker in the Family


A while back, I blogged about my oldest daughter Casey making a dovetailed keepsake box. I have a younger daughter also, Gillian, who's 11 (12 in eight more days), and she has been on me to get out in the shop and build something since I was laying the brick for the foundation of the new shop. Well we finally got out there to work on something a few weeks back. She chose a sliding lid candle box as her project. I went to the home center and picked out a nice 1 x 6 piece of clear pine and we were all set to go.

To get started, we sketched out a basic plan for the box and determined the size that she wanted and then it was time to start laying out and cutting. I set her up with a 6' folding rule, my striking knife and wooden square for marking a line, and my crosscut backsaw and bench hook for sawing. I also had her chisel a kerf on the waste side of the struck line to give a nice shoulder for the saw to ride against. With just a little instruction, she was on her way. She did a great job crosscutting the pine to size and as long as she remembered to keep an athletic stance and light grip on the saw, she went through it like a pro.

Marking an end with a striking knife and a wooden square.

Sawing to  the line with an athletic posture and a light grip.

Not a bad start!
Once she had the two sides and two ends cut to length, I had her lay out the rabbets in the sides to accept the ends. She marked her lines on the ends with a Hamilton marking gauge set to the thickness of the pine and then marked the end grain to 3/8". After chiseling a kerf on the waste side of the marking knife line, she sawed down to the 3/8" mark and then I had her chisel out the waste with her chisel placed just above the 3/8" scribed line. From there we did a little clean up with a rabbet plane.

Marking a line for the rabbet.

Chiseling out the waste.

Once the rabbets were cleaned up, it was almost time for assembly, but not before making a groove for the top to slide in. My current plow plane only has one iron, and it was wider than we wanted for the groove, so we decided to do it old school. I had her mark the top of the groove with a marking knife on both sides and on one end and then reset the gauge and mark the bottom of the groove on the three pieces, scoring all the lines deeper than normal. Then, armed with a chisel and a mallet, she went to plowing the groove. I showed her how to use the chisel bevel down and start at the far end of the piece and work her way back as she made her groove. Then we used the bottom of the groove to set the height of the front piece where the top would slide over it and cut that to width. Now it was time for some assembly.

Laying out the groove for the top to slide in.

Chiseling the groove.

Working her way back.

We just used yellow glue and some headless brads from Tremont Nail to put the sides together. I set her up with an eggbeater drill and the smallest bit I had, but before she went to drilling I showed her how to lay out even spacing on the nails using a pair of dividers. I'm a big fan of using dividers for measurement. Much less chance for error than when using a rule. She did a good job with the drilling (she didn't break my tiny drill bit) and hammering the nails.

Using the eggbeater, very carefully.

Putting it all together.

After the glue had dried we measured up for the bottom and Gillian cut a piece to length on the bench hook and then ripped it to width on the saw bench with a somewhat fine toothed rip saw I made. She was a natural at ripping. Followed a line as good as any seasoned vet and while keeping everything nice and square. Next was the only tool she really had trouble with, the plane. I'm not sure if the bench was a little too tall for her or if she didn't have enough weight to hold the plane down to the wood firmly, but I ended up doing the planing for her, planing the edge of the bottom until it piston fit in place. More laying out with dividers, boring holes, and nailing to install the bottom. Now for the top.

A natural with the rip saw.

Same routine to start the top as was for the bottom, cut to length and rip to width. Then I planed a bevel on the top for her until it slid smoothly back and forth in the groove. We added a recessed finger pull with a gouge for good measure. Time to pick a finish.

Gillian wasn't sure if she wanted a stained or a painted finish so we took a piece of the pine that was leftover and tried several different stains that I had on hand. After seeing how the stain looked on the pine, she decided she would paint it. Good choice. She liked the milk paint I'd used on my tool chest and I had some left over so that made the decision of color choice an easy one. Two coats of milk paint later and she had a nice little keepsake box that I hope will stay with her for the rest of her life, as well as the memories of building it. I know those memories will always be with me.


The proud woodworker, very pleased with her results.

One of her weapons of choice, my crosscut sash saw.

Great job Gillian!


Thursday, August 1, 2013

A Somewhat Hidden Gem in Southern Maryland


In addition to woodworking, American history is another passion of mine. I've always enjoyed learning about 18th century America; not only the political history leading up to and including the American war for independence, but probably even more so, the social history and how normal colonial citizens lived their daily lives. I had been to Colonial Williamsburg, the premiere living history museum in America, once or twice as a kid, but rediscovered it around twenty years ago and got kinda hooked on it. Just ask my wife; I dragged her down there so many times that she got burned out on it and had no desire to go back for about two years. I think she's finally ready to venture back down there though. :-) Visiting the Colonial Williamsburg trade shops, especially the Anthony Hay cabinet shop, was a big influence on my wanting to go the way of hand tools only in my woodworking. I would see the skills of the craftsmen in the Hay shop and the beautiful work they did using only 18th century style tools and methods. I don't know if it was the romance of the whole thing or the lack of noise and dust that drew me to hand work, but I'm glad something did.

I say all that as background to what this post really is about, our own living history museum in my home county. I'm half ashamed to say it, but in all my years of living in St. Mary's County, I'd never taken the time to visit our own living history museum, Historic St. Mary's City. I'd drive 3 hours one way half dozen times a year to visit Williamsburg, yet had never driven the 30 minute drive from my home to visit St. Mary's City. Shameful. Well, I finally rectified that last week when I took my two daughters there for the day to check things out. We were all pleasantly surprised at what we found.

St. Mary's City was founded in 1634 and served as the colony of Maryland's capital from then until 1695 when the capital moved to Annapolis. After a tenuous start, St. Mary's City thrived in the second half of the 17th century with a booming tobacco economy and a growing population which led to the construction of public buildings. But when the capital was moved to Annapolis in 1695, St. Mary's City's population quickly dwindled and soon there was not a trace of the old capital. An archaeological program was started in 1969 and unearthed hundreds of artifacts and foundations of original buildings. I'm not sure when the site opened as a living history museum, but it's been there pretty much as long as I can remember.

The girls and I started our day off watching the orientation movie in the gift shop, then it was off to the reconstructed state house and then down to the water to board the Dove, a recreation of one of the two ships that brought the 1634 settlers and their supplies from England. After a picnic lunch, we walked to the Town Center, which consisted of a couple dwellings and a print shop where the girls got to ink and operate the press and then got to keep the contract they had printed. This is the advantage of being the only ones there for the print demonstrations. For the most part, we had the place mostly to ourselves all day. This is good for the visit, but hopefully not too bad for the survival of the museum.

Next it was on to the Indian village where we learned about the Yaocomaco, the native people of the land. They welcomed the new English settlers and even rented there lodgings to them while they built thier houses. Next we took about a half mile drive to the Godiah Spray tobacco plantation. Godiah Spray was quite well off by colonial Maryland standards and the museum has recreated his home and two outbuildings. They also have pigs, cows, and chickens at the plantation, as well as tobacco fields and a herb garden. The costumed interpreters here were fantastic, as they were throughout the museum. The three that were at the Spray plantation when we were there were all portraying indentured servants. We ended our day at the visitors center/museum where there were many 17th century artifacts on display that were found during archaeological digs around the  site.

I am so glad that I finally went to Historic St. Mary's City, although somewhat ashamed it took me so long to get there. It won't be my last trip. If any of you are within an hour or so of the site, it is well worth your time to visit. They have done a great job recreating the building there and the costumed interpreters are friendly and knowledgable. There was even a jointer there, although he disappeared for lunch before I got a chance to talk to him.


Inside the State House.

Wainscot chair

Joined Chest in the State House.

Gate leg table and chairs.

Casey, apparently cool with being in the stocks.

Gillian, looking pretty guilty. Bring on the rotten fruit and vegetables.

The Maryland Dove.

The Captain's quarters.

Beautiful views along the banks of the St. Mary's river.


The print house.

Casey inking the type set.

Gillian operating the "devil's tail".

One of the lodgings at the Yaocomaco site.

Inside the long house.

One of the dwellings in town center.


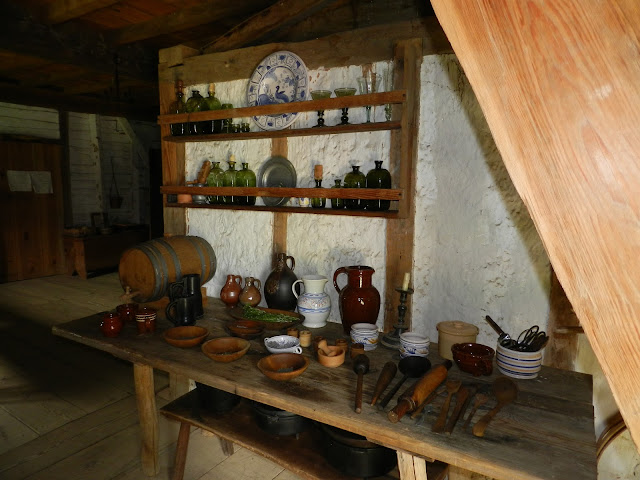
TOOL SHOT!!!

Joined chest at the Spray plantation.

Another chest and wainscot chair at the Spray plantation.

Monday, July 29, 2013

A Great Week of Woodworking and Fellowship

July 13th thru the 19th was as enjoyable a seven day stretch as I can remember ever having. I spent those seven days in tiny Pittsboro, North Carolina at The Woodwright's School. My wife, Jen, had gotten me the trip as a Christmas gift for the Saturday and Sunday Restoring Wooden Planes class. Then, about two months ago when I told her that Peter Follansbee's Joint Stool class started the day after the plane class ended, she told me to go ahead and book that one also. How cool is that?! She's so good to me. :-) She rode down with me on Friday and stayed with me thru Monday morning, when she had to head back home. We stayed in a nice little bed and breakfast, the Rosemary Inn, that was within easy walking distance to the school. It was a nice little get-away but unfortunately Jen spent most of the weekend battling sinus issues and working in the room. Probably not quite as fun for her as it was  for me. :-(

Saturday morning I headed to my Restoring Wooden Planes class with Bill  Anderson as the teacher. Bill's a great guy and a great teacher. He explains things well and is very helpful with diagnosing problems. I was glad to get my large Clark and Williams smoother operating properly. Ever since I'd bought it, I could never get the wedge to hold. After trying a couple different things with no luck, Bill checked the iron and sure enough, there was a hump on the back side of the iron. A little time at the grinding wheel to hollow out that hump a little and I had a functional premium wooden smoother! I was also able to rehab two dado planes and patched the throat on a vintage smoothing plane. I learned a lot and was glad to get these 4 planes functioning properly. It was a productive weekend for sure.

Sunday night I was like a kid on Christmas Eve waiting for Monday morning and the Joint Stool class with my co-favorite woodworker, Peter Follansbee. Making it even more exciting for me was the fact that Monday morning was to be spent busting open oak logs at the home of my OTHER co-favorite woodworker, Roy Underhill. Monday morning started out with Roy showing us around his place and getting to know the other students in the class. We had a great bunch of guys! The first person I met was Jerome Bias, the joiner at Old Salem historic sight. I was familiar with Jerome from seeing him on an episode of The Woodwrights Shop and from the internet but it was great to actually meet him. There were a couple people who traveled a pretty far distance to attend, Kelly from Dallas and significantly further, Dave all the way from New Zealand! Roy spent most of the week trying to get Dave to try distinctly American/southern dishes ( Chicken and Dumplings, Pecan Pie, etc. ). There was Luke from Virginia who worked as a historical interpreter at a living history museum in the Richmond suburbs, Bill and John, both great guys who were fairly local to Pittsboro, and Tony, who it turns out lives less than 5 miles from me! Small world. Bill Anderson rounded out the class, finishing up a stool he'd started the last time Peter was in town. After some donuts for fuel in Roy's kitchen, we were off the rive some oak. Turns out we had some primo, straight grained oak logs that Elia Bizzarri had sent to Roy. After getting about 40 stiles, 40 stretchers, and 20 aprons ( 1 long and 1 short apron out of each apron blank ) it was back to town for lunch and some hewing and planing at the school. I never had a bad meal all week by the way. Pittsboro's restaurants are all very good! After lunch, we started on the stiles. Green oak planes SO easily and before long we had barrels of shavings all over the place. We also found out the importance of cleaning your tools at the end of every day. The tanic acid from the wet oak will rust out plane irons and chisels in a hurry.

Day two and three were a lot more hewing and planing with I believe some cutting of tenons and chopping of mortices mixed in along with chamfering the stiles and adding lambs tongues. I really enjoyed the new experience of green woodworking. And Peter's method of chopping mortices was better than any I'd ever tried before. He starts in the middle of the mortice and alternately works his way toward both ends. Works great. Thursday I got to do some carving, which was a lot of fun. I used Peter's scratch stock and then found a nice SJ Addis gouge upstairs at Ed's amazing tool store that was just the right size and sweep that I needed to complete the carving on the  aprons.

Friday was the moment of truth when we got to assemble our stools, drilling and drawboring everything together with bone dry oak pegs that Peter had brought with him. A draw bored joint is a powerful strong joint; no glue necessary. I hated to see the week end, but it was very satisfying to see a stool come together from what was a log a few days before. I didn't have time to get the seat board finished and attached before I left, but I got that finished up earlier today, applying a thumbnail profile on the edges using a rabbet plane, a fore plane, and a smoother. All that's left now is to apply some sort of clear finish to the stool and enjoy 400 years of comfortable seating. ( Peter says that they're guaranteed for 400 years, after that you're on your own. )

I can't say enough about how enjoyable  and educational this class was. Peter is a first rate teacher and one hell of a nice guy to boot. He kept the class fun and entertaining all week. I'm really hoping he comes back next year for a carved box or joined chest class. I'll be first in line to sign up for one of those. And God bless Roy Underhill for all he's done and continues to do to promote the craft of hand tool woodworking. He is a tireless champion for the cause. I'm very lucky to have learned from both these men as well as from Bill. Can't wait to get back down there next year!


One of our three prime oak logs.

So this is what we're supposed to end up with?

Our Motley Crew.

Splitting very nicely.

A stack of stretchers and a stack of aprons.

Back at the school squaring up a stile.

Draw boring it all together. That's Kelly in the background.

Getting a little silly. The victory pose after draw boring it all together and weight testing.

Roy, Peter, and myself with my almost completed stool. Doesn't get much cooler than that for me.

Back at my shop, seat board with the edge profiled and pegged onto the stiles.

In the light and shadows.

A little closer look at the carving.